Posted on Leave a comment

Here’s how neem oil can do double duty for organic gardeners

Neem oil. It’s a thick, tan-colored oil extracted from the mechanically-pressed (or chemically-processed) seed of the neem tree. Neem is one of those plants that is almost certainly under-utilized across most of the world. It’s all-natural and vegan. You can use neem oil for organic pest control but wait, there’s more…

Organic neem oil benefits and uses. Read more at farmstand culture.com

Don’t eat the neem

Yes, I know that the very young shoots and leaves are prepared in dishes in some countries, but long term ingestion of neem is likely to harm internal organs. Neem is toxic to children and pregnant women. Avoid ingesting neem if you are pregnant or nursing.

If you keep neem in your house, ensure that it is out of the reach of children.

What’s the “double-duty” then?

#1 duty: Use neem oil for organic pest control in your garden. I get a ton of pests in my garden in the summer. I pick them off the leaves and use all sorts of preventative measures, like broken egg shells, jute rope, copper tape and a solar-powered owl, that looks fun but is mostly ineffective.

There’s only two organic-friendly garden treatments that offer me any success. One is neem oil. The other is coyote urine. If I have to choose, neem oil smells better but not by much.

It’s not a good idea to eat a lot of neem oil, but it also breaks down quickly in the environment. I spray my plants on a day when I know two things are not going to happen.

  • First, I won’t be harvesting and eating the veggies for at least two days. That’s the half life of neem’s active component, Azadirachtin.
  • Second, it’s not going to downpour and wash away some of the protective oils. Water makes the Azadirachtin breakdown faster.

Neem oil in organic gardens

Every two weeks in the summer, I fill a spray bottle with warm water and add a cap full of neem oil. I shake it up and spray it all over my backyard garden. For my 20′ x 60′ garden, I need to fill the bottle twice.

Neem deters and kills aphids (they’re garden enemy #1 at my house), snails, nematodes (that’s too bad, I kind of like them), cabbage worms, gnats, moths, cockroaches, flies, termites and mosquitoes.

Some internet sites list Japanese beetles as one of the bugs killed or repelled by neem; however, in years when the infestation is really intense, all kinds of beetles power-through my neem defenses. It might help, but it’s no cure-all.

The great news is, neem oil is practically non-toxic to bees, birds, fish and plants! I would never harm my neighbors’ honey bees. Look how cute they are.

Looking for more technical info on neem oil? Here is a great cheatsheet from Oregon State University.

Another use for neem oil

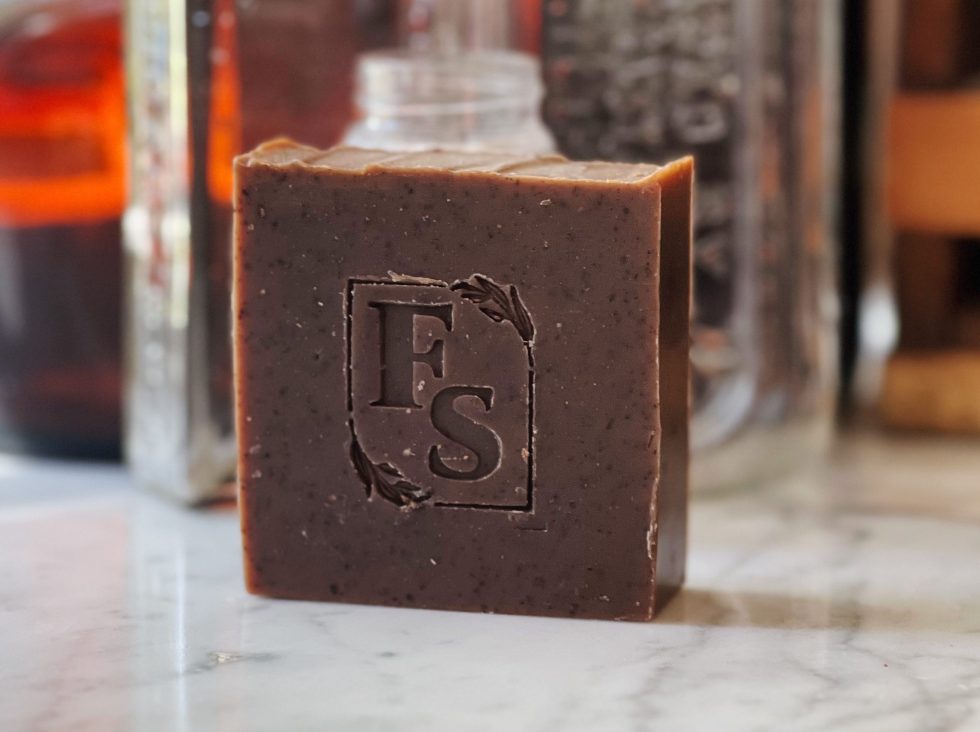
I did say neem could do double duty for you. In addition to using it in your organic garden, you can use neem oil to make homemade soap. It’s cleansing, moisturizing and deodorizing!

One piece of advice, don’t use too much neem in your soaps. It can feel a little bit heavy on your skin if you overdo it.

When I make soap, I usually use a base of olive oil, coconut oil and shea butter. Neem oil works best if it’s less than 10% of the total oils in your recipe.

Nutmeg butter soap Homestate soap Handmade vegan soap
Homestate nutmeg handmade soap

Here are some tips on how to use almost any oil laying around your house to make soap. You really just need a basic recipe and a little practice with a soap calculator. I use the calculator at soapcalc.net for all of my homemade batches.

Nutmeg and Neem vegan handmade borage and babassu soap

Bonus: since a little goes a long way, one bottle of neem lasts me more than a year!

Posted on Leave a comment

Best five things to buy at Log Cabin Farm Stand, Eastham, MA!

July 25, 2019

Log Cabin Farm Stand, Eastham, MA

Next time you visit a farm stand, try playing a little game. Rank the top five items! You’ll feel more mindful of the freshness of the food. You’ll probably notice a few items you might overlook if you just rush through your visit.

It’s fun! I make a farmstand5 ranking for every stand I visit. Here are the five best things to buy at a quaint, roadside farm stand in New England! Today I poked around the Log Cabin Farm Stand in Eastham, Massachusetts, a little more than half way up Cape Cod.

#5 Fresh (and cheeky) corn on the cob

Yes! Fresh corn season arrived. Notice the cheeky sign above the corn. In New England, we pull off the husks, boil it for about half an hour, then eat it right off the cob. My friends from France always thought it was so funny. Guess they always cut the kernels off first. How do you eat your fresh corn?

#4 Assorted potatoes

Love the colors. What a beautiful potato salad these three kinds of spuds would make! It makes me want to chop up some celery and pickles for a potato salad tonight. Oh yeah, gotta have pickles in my potato salads!

#3 Adorable, colorful cherry tomatoes!

The Log Cabin Farm Stand only had two little containers of these brightly colored rainbow cherry tomatoes left by midday! Guess everyone wanted a fresh, tomato salad side dish with dinner tonight. There was a big container of fresh-picked basil to slice up and add to the tomatoes, a little sea salt on top, yum!

#2 Seasoned firewood

Firewood is just one of those special farm stand finds I had to highlight here. At $10 per bunch, they’re a good money-maker for the farmers. Plus, everyone loves a bonfire on a cool summer night. In Eastham, you can wake up early (I mean E-A-R-L-Y) and wait in line for a permit to make a bonfire on one of the National Seashore beaches! Makes for an amazing night, staying warm by the fire, watching the seals swim by.

#1 Handturned wooden bowls

A local, Cape Cod tree cutter turns his extra wood into handcrafted bowls. So beautiful. I held each one and looked closely at the different grains. A tag on every bowl identified the species of wood. The fourth one in – the one with all that grainy character – lives in my kitchen now.

A quick preview of Apple season before you read on…

Posted on 4 Comments

I’m giving it a go again…why I bought a CSA share this year. Food for thought.

Our neighborhood got its first CSA share program (Community-Supported Agriculture) about 10 years ago, and I was an early subscriber. But, but, but…after a couple of seasons, I quit. Here’s why I quit my old CSA share program years ago and why I joined a new one this year!

Oh you people and your acronyms

CSA, or Community-Supported Agriculture, is a fancy way of saying I pre-ordered a summer full of farm-fresh but unpredictable weekly produce.

A local farmer gets some money up front to buy her seeds without going into debt, and I feel good about supporting her while mentally committing my family to cooking with farm-fresh produce all summer.

Not my first (CSA) rodeo

I quit a CSA six years ago, not because it wasn’t good but because it was too good. We got an abundance of produce. Produce fell out of our fridge. Organic produce that was ripped from the ground that day and needed to be washed and washed and washed.

My dad pitched in for produce pickups, as did my mom and sister. It became more and more difficult to find someone to help us to make it to the farm before it closed, fill our bags and drop them off. It was even harder to find a volunteer to wash it and prep it for cooking.

What brought me back

A new farmer opened up a business in my neighborhood. She’s inspiring. I tried her farm stand last year, and she sold all varieties of beans, squash and eggplants I never saw before (and I’m always looking for great farmstand finds!) She impressed me with her interesting choices.

Buying a share of her CSA program lets me support a local startup farm, connect with my neighbors and expose my family to some really unique produce.

Also, I am a lot more realistic with my ambitions now. If we don’t eat it within two days, it becomes a soup.

Here’s what I did with my first week’s share

My favorite were the fresh pea shoots, which are just the tops of the pea plants snipped off. Delicious if you just mix them with salad dressing. I added chopped onions, chive blossoms, and mint, too. The chive blossoms came with my CSA share, but they didn’t add much flavor, just a light purple color.

Field garlic got smashed into a soup made from the maitake mushrooms. I added chopped carrots and celery.

Radishes are one of my favorite vegetables. A nice helping of radishes showed up in my CSA share. I quartered and sautéed them with olive oil, sea salt and black pepper. After the radishes softened, I threw the washes radish greens on top and sautéed those, too!

Another thing I liked about this CSA, I don’t have to subscribe to flowers separately. She included a posey of mixed flowers.

And finally, the mixed bag of baby braising greens – bok choy, beets, chard and kale. My farmer suggested a stir fry or sauté, but since I didn’t eat the greens within two days, I’m going to follow my rule and make a soup.

And you?

Did you ever quit a CSA share program?

How come?

Would you go back?

Posted on 12 Comments

She was my first follower.

About a year and a half ago, my cousin and I were chatting at a family party. I told her I needed an outlet besides work and parenting and was planning to start this blog. She loved the idea! She was so supportive.

Of course I wanted her opinion. She worked at a farm stand when she was a teenager. When I thought about farm stands, I often thought about her.

As soon as I published my very first post, I texted her.

She was living out on the West Coast then. Within an hour, my first little blue WordPress notice popped up on my phone. “meaghan.elizabeth.burns is now following you!”

On her birthday, she posted this comment:

The love of family. I thought about that comment many times in those early days. It was just so encouraging. I hope you all have someone cheering you on in your life and your smallest accomplishments, like I had Meggers.

She was my first follower. And now she is gone.

I’m staring at her comment today because it is so kind, so positive, so thoughtful. It keeps her alive a little bit. I am not going to write about her death. If you can handle reading something very heartbreaking, you can search for the news.

Meaghan Burns of South Deerfield, Massachusetts: born August 25, 1995 – died May 4, 2019

Today, I want to remember her bright, shining 23 years of living. I want to memorialize the little, everyday moments we had with her.

Like the time she went on her phone and followed her cousin’s blog.

Like when she took time on her last birthday to write a comment. It meant a lot then. But now, oh my God. It takes the breath out of me. I love her so much.

My aunt, uncle and her little sister wrote a touching obituary for her. Here’s a link.

https://m.legacy.com/obituaries/recorder/obituary.aspx?n=meaghan-elizabeth-burns&pid=192824016&referrer=0&preview=false

Posted on Leave a comment

My 3 tips to adjust to pumping breastmilk at work

My 3 best tips on how to adjust to pumping breastmilk at work

Last week, I texted my cousin-in-law about her transition back to work after maternity leave. She was holding up but hating pumping at the office. It brought back a lot of memories for me, too. Here are the 3 tips I gave her on how I adjusted to pumping breastmilk at work.

First, my street cred

I pumped for a year-and-a-half in total. My kids are 19 months apart, so I never got out of the swing of things. I pumped on airplanes, in other countries, with a manual pump and an electric.

My first baby clusterfed…look that one up if you (like me) never heard of it before…and as a result, I had so much frozen milk, I donated 271 oz to babies in need through the Mother’s Milk Bank Northeast.

Credentials verified.

Here are three key tips I learned that I hope will help you or someone you know who might be struggling with pumping breastmilk at work.

Tip #3: brighten up the place!

My company moved offices when I was pumping. The first place I pumped was a dirty, dusty storage closet that shared a wall with our main boardroom. Pause. You know what that electric pump sounds like? Well, my firm’s all-male Investment Committee does.

It was depressing and embarrassing to pump in there.

In our new office, we upgraded to a room with a couch, sink and mini-fridge! But, that’s not what I remember most about it. People collected artwork and put it up in the “wellness room”.

It turns out, lots of people have one-too-many works of art in their office. Ask for donations. All of that artwork brightened up the room and the experience.

I understand that not every company dedicates a room to pumping moms. Sometimes, I pumped in bathrooms, in my car and underneath a blanket.

Just think out-of-the-box! Brighten up the experience with a blanket or nursing cover with a bright, bold fabric on the inside. Something that makes you smile.

Put some art in your pumping bag. Line the zipper flap with a laminated print (I like Rockwells) or put finger paint on your baby’s feet and make a sweet print of your own. Baby feet positioned just so can look like a flower, sun rays, butterflies, hearts, and more!

Tip#2: reframe your break time

Unless you’ve got some seriously odd ducks at your work, no one is gonna bother you while you pump. Enjoy your me-time.

Shut the door on all the craziness. Close your eyes. Take a deep breath. Relax your jaw. Roll your head around; loosen up your neck. If it sounds like a meditation, that’s fine. If you want it to be an effective pumping session, you should start by making an attempt to relax.

You’re going to spend the next 20 minutes connecting with your baby, not with your coworkers and the typical office nonsense like, having a meeting to plan the next meeting.

And anyway, it’s all temporary. In just a few months, you’ll be back to your old schedule. You can remind your coworkers of that fact if they’re fussy with all of your breaks.

Believe me, coworkers’ fussiness can’t compete with a 3 year old’s fussy time. Get ready. Actually, when baby is a preschooler, re-read my #1 tip to get kids to listen. I hope it helps.

For you, when the end of pumping comes it might be bittersweet…it might be a relief…either way, the end is not far from now.

I know it’s hard to plan for those break times. I know you might pump on the way to work in order to minimize your break times. Rushing to forced break times can be stressful.

The truth is, you’ve got to reframe it as a little calm respite. The more relaxed you are, the more you can focus on your baby, the more milk you’ll get.

Tip#1: get a good book!

I never read as much as I did while I was pumping breastmilk at work.

In retrospect, I was bored of tv.

Between waiting for the baby to arrive and taking some time off after, I watched shows and series and wanted something new. Books!

Someone left a copy of Gladwell’s The Tipping Point in our “wellness room”. That was the first book I read while pumping. It’s interesting and easy-to-read, but I quickly graduated to fiction.

I read American Gods by Gaiman (thank you to my friend, also named Tiffany, for that recommendation) and finally caught up with other moms on Fifty Shades of Grey.

Then, I started the Outlander series…but it took me over a year to read and listen all the way through to book 8. If you don’t mind not having a paper copy, your Audible app will sync with your Kindle or Kindle app on your phone or tablet.

To get through all 15,000 pages of the Outlander series, I listened on Audible during my commute and read on my Kindle app while I pumped or nursed. 

Oh gosh, and if you want nonfiction, the best books about pregnancy or childhood are by Dr. Emily Oster. Hands down.

Hey, you can always download a tv series and watch that instead of reading. I know plenty of great people who don’t read.

But, I’m still completely nostalgic for the feeling of anticipation I experienced when I knew that I would be near the end of an exciting chapter. I hurried to the “wellness room” to slap on my pump and pick up my book!

The anticipation to get back to a good book stays with you. It lingers. If you have any great book recommendations for other readers…please leave them in the comments! Thank you!

Posted on 8 Comments

Who is the cutest baby herb seedling in my herb garden?

Everyone loves an adorable baby, especially when that sweet little cutie is a baby herb seedling. Enjoy these pictures of all of the little babies growing in my kitchen window herb garden.

Keep reading, I’ll reveal my choice for cutest of the cute.

Genovese Basil

Basil babies have a soft, round look to them, like chubby little cheeks.

Oregano

A tiny little choir of oregano seedlings grew from itty-bitty black seeds.

Spinach

Nature is so funny. Would you believe these lanky green shoots turn into oval spinach leaves? Check out the little curly ends, awww.

Catnip

My catnip took so long to sprout, it’s still just emerging from its sleep. One miniature sproutling is just popping through.

Tomatillo

They’re not just any ordinary tomatillo. These baby herb seedlings are going to grow into purple tomatillos!

Parsley

Something about the leaves on a crowd of baby parsley reminds me of a flock of birds. Or at least, the way I draw them as V’s.

Bay leaves

Wee baby bay leaves…it should be a nursery rhyme. I love plants that start as tight buds. One day, they burst into an explosion of little leaves. I cheated a little with this one. It’s not a baby herb seedling, just baby leaf buds.

Ground cherries

You all know I’m partial to ground cherries. I created a salsa recipe featuring ground cherries instead of tomatoes, so unexpected. If I didn’t harvest these seeds myself from some ground cherries I picked up at this farm stand, I would not recognize this bowtie-shaped baby herb seedling.

Cilantro

So easily confused with baby parsley, cilantro leaves are more full and less spikey on the ends. They look like tiny little fans as they begin to form. Cilantro babies sprout in pairs; in other words, they’re twins!

Nasturtium

I confess. I have a favorite baby. It’s a nasturtium seedling. Every time I find one coming up in the garden, it makes me smile. Every. Time. Baby nasturtium leaves look like a little duck landed head first in the dirt with her feet up in the air. Too cute.

Newborn kale is pretty cute, too, but we’ll have to wait until I can do a feature on herb babies of the outdoor garden in May!

How about you? Do you have a favorite baby herb seedling? Leave a message in the comments.

Posted on 1 Comment

How to tap a maple tree

Close up photo of clear, watery Sugar Maple sap in a bucket with a maple tap

Within 40 steps of my house there are seven Sugar Maple trees. Big trees. Historic trees. Right now, I have four buckets hanging from three of the trees, collecting maple sap. Here’s more about how to tap a maple tree.

Why tap a maple tree?

Drink sap straight from the maple. It’s got electrolytes, antioxidants, vitamins and minerals. Fresh maple sap is a fantastic recovery drink post-workout (or a natural hangover cure).

Offer bottles of pure maple sap or cooked syrup at a farm stand at the end of your driveway.

Best tip ever: use maple sap right from the tree in place of water to brew lightly-sweet coffee or tea! Hot lemon water, lemonade or limeade would also be delicious made with maple sap instead of water.

I wouldn’t do this in my coffee maker because I can’t clean the natural sugar out of the lines, but it would be wonderful in a French press. We just boil the sap and drop in a tea bag.

Hey, if you have time and energy, you can boil the sap down to maple syrup. 100% pure, natural maple syrup.

The stuff you get at the diner is none of those things. Diner syrup is mostly corn syrup, flavoring and preservatives. I know it’s delicious on pancakes. It’s just not maple syrup. There’s no tree involved.

Where do tapable maple trees grow?

Maple trees grow from Canada to Tennessee and Missouri to Maine.

View a map of the maple-growing region by Lake Forest College.

You can tap some maple trees but not all. If you have one of these five maples, you can tap them:

  • Sugar maple (highest concentration of sugar)
  • Red maple (but not a Japanese red maple
  • Silver maple
  • Black maple
  • Box elder maple (aka Maple Ash)

When I told my neighbor I was going home to tap my Sugar Maples, she got so excited. She never tapped a tree before. They don’t grow well where she grew up.

She tilted her head and gave me a smile like she was watching a sappy movie (pun for fun). “Ohhhh, it’s so New-England,” she sighed.

That’s right. I am surrounded by Sugar Maples. It’s exactly the kind of thing I should share with you, no matter where you live.

How do I know it’s a maple tree?

Sure, it’s kind of hard when there are no maple leaves on it.

Search online or in an app specially designed to help you identify trees. There are even sites and apps that help you identify maple trees.

Mature Sugar Maple bark looks like this.

Up close photo of sugar maple bark

Twigs grow on maple branches in pairs directly across from each other. There’s a good example of this pairing along the right side of this photo.

Sugar Maple twigs and branches for identification

When can I tap them?

Early March is a good time to tap, but it is possible to tap trees in mid-February. You want “warm” days and cold nights with the day time temperature to be around 40 degrees Fahrenheit/5 degrees Celsius and cold nights that fall below freezing.

Go ahead and tap your trees in February if you just want to drink the sap straight from the tree. It tastes like lightly-sweetened water. It looks like water, too; because, well, it is mostly water.

At the beginning of sugaring season, the sugar content is lower. You won’t get enough to cook into a meaningful amount of maple syrup, and it spoils after a week.

Things to consider

  • Drink the sap straight. It’s full of electrolytes and antioxidants. Sounds like a great hangover remedy.
  • Fresh sap doesn’t store for long. Up to a week, if kept very cold, outside covered in shade, in a bucket surrounded by snow. If it turns yellow, pour it into your compost pile.
  • Never cook sap inside your house. It ruins your walls and ceilings with condensation.
  • Cook sap outside on a grill, turkey fryer, or maple syrup evaporator…or in a sugar house.

As an Amazon Affiliate, I earn for qualifying purchases.

Collecting maple sap is easy

Keep it simple and cheap by just drilling a hole and sticking a straw or rubber tube inside. Be sure to cover your collection bucket with a lid though. Bugs and bark fall inside. You will still have to strain or filter some debris out of your sap.

I bought this Maple Sugar Starter Kit, which came with everything in one box: buckets, lids, spiles (metal taps), drill bit, hooks, and cheesecloth for straining out the debris. I’ll include links below for the components, in case you don’t need a whole kit.

Close up photo of clear, watery Sugar Maple sap in a bucket with a maple tap

How to tap maple trees

Step one: identify a maple tree at least 18″ in diameter
Step two: drill a hole on the south or southeast side of the tree using a cordless drill (electric drill if your extension cord reaches) or a hand drill at a comfortable height. Waist-height works pretty well. Your drill bit should be almost as large as your spile/tap, and you should drill on a slight upward angle.
Step three: insert a metal spile/tap or plastic spout and tube that drains into a bucket, bottle or even a clean milk jug
Step four: cover the bucket with a lid or plastic wrap held on with tape or a tight rubber band so the wind doesn’t blow it off.
Step five: drink the sap straight from the tree or use it in place of water to make tea, iced tea or lemonade.

Cooking sap into maple syrup

If you get at least 10 gallons/40 liters of maple sap within a couple of days, you can cook it down to make maple syrup. Any less than that and it will only make a mug full of syrup, which seems hardly worth the all-day effort.

Collect and use or cook the fresh sap within a week if stored in a cold, shady spot, packed into snow. It spoils like milk, unfortunately.

Close up photo of clear, watery Sugar Maple sap in a bucket with a maple tap

How to cook maple sap into syrup

Filter your sap first to remove the bark, bugs and debris that land inside. You can use cheesecloth or maple syrup filters. You can purchase a kit for filtering your syrup, too.

Set up a place outside with plenty of fuel to keep your sap boiling for hours. I use the side burner on my grill, but a turkey fryer or maple syrup evaporator will do.

DO NOT cook maple sap in your house. As it boils for hours, it will make so much condensation that drips down your walls and ceilings, ruining them.

Pour your sap into a giant pot and boil away. You can add additional sap as it cooks down.

If you can, bring up the temperature of that fresh sap you are adding so it’s not freezing cold. I pre-boil pots on my stove and then add them to the big pot. You want to keep the pot boiling. Otherwise, it’s ok. It will just take longer to cook down into maple syrup. Long. Like a whole day.

Warning! Watch your pots. Check them frequently. If you burn the syrup, you ruin a whole batch. Yikes!

You want to cook it until it’s a brown-amber color, the color and taste of maple syrup. Oh yeah, I poured some 100% pure maple syrup on snow so you could see the color of a New England snowcone.

Maple syrup poured onto snow - pretend snowcone

Delicious! Pour it on pancakes, vanilla ice cream, oatmeal. Mix it into your tea, coffee or latte. Make cookies, candy or fudge.

Posted on 8 Comments

The best, simple way to get kids to listen to you

smiling emoji

Back in the Fall, I posted an article about getting kids more involved in gardening with six simple garden tasks. Of course, if they are unlikely to listen, you might never get them to the garden to try out Step 1. With two kids, two nephews, a niece and a Godson, I’m no kid-whisperer, but I’ve learned something really critical about how to get kids to listen.

Whether the kids in your life are toddlers or teens, the time will come when you need them to do something. Give this idea a try.

Hey, I can’t guarantee you’ll get results the first time you try this technique. In fact, it’s more likely you will have to practice. But, once you get the hang of it, expect to get kids to listen more than half of the time…within 5 minutes of asking with no yelling, badgering, whining or door-slamming.

Sympathize

Imagine that you started learning a brand new language three years ago. You practiced every day. You feel pretty good about the effort you put into learning this new skill. You still might not be completely fluent, but you follow most simple sentences and can ask questions in your new language.

Now, imagine you are a guest speaker at a high school where the students are native speakers of your new language. You grab lunch in the cafeteria before your scheduled speaking time.

Great, it gives you a chance to listen to the native chatter. It’s noisy, but you manage to hone in on conversations happening all around you.

You catch some words here and there. You hear words that sound close to the words you know, but are they? You try hard to focus. Even so, by the time you translate a phrase in your head, the conversation moved so quickly, you’re lost again.

Your head starts to ache. You get cranky. You tune it all out. I know because it happened to me.

That was pretty much my experience when I lived in France with a roommate who spoke no English (except the word “jump”…um, unexpected).

We drove through Northern Italy in a tiny car with two of her friends. Every once in awhile, they stopped talking to take a breath and explain some slang to me. My head ache. I couldn’t translate fast enough. And, it turns out native speakers use a lot of slang. Whatevs.

Words, words, words

I remembered that car ride years later when I heard my husband (sorry, babe) speaking at our kid. For some reason, my loving, wonderful man-of-few-words saves them all up for fast-paced conversations at our kids.

Like, take a deep breath and read this quickly…”what are you doing? Why are you still playing with that toy? We’re late, again, and you don’t seem to care. You’re just sitting there, and oh my, oh come on, you took off your shoes? Why aren’t you wearing shoes? I spent 10 minutes picking apart the knots in those laces, and why do I even bother? Ok. Did you use the potty? Where are your boots? Just wear those. Let’s go. Let’s go. Put down that toy. No, just bring it with you. Oh man, where’d I put the keys? Has anyone seen the keys? Ugh, we’re late. Come on.”

People do this all of the time, don’t they? Put yourself on the receiving end of that loooong string of words, words, words. How do you respond when this happens?

I know, when I’m on a conference call and someone is speaking a mile-a-minute, dropping business buzz-words and going on and on, barely breathing so they can make every last point…I tap my phone on and look for a distraction. Or I just zone out, stare out the window, maybe raise my eyebrows and blink, hard. And, that’s after 38 years practicing English as a native speaker. The kids only started learning English a few years ago.

Get kids to listen

To a kid, it must sound like an auctioneer…or a bunch of slang-speaking young people chatting incessantly. There has to be a better way, right?

If it was you, how would you want to be treated?

Once I made the connection to the way I felt spending hours in that car with those native Francophones (fancy way to say people who speak French…you’re an Anglophone, btw), I decided to try getting my point across to my kids in one word.

When I really need the kids to do something, I think of the key word I need them to hear. It’s a fun challenge to try to convey what you need to in one word. But, with practice, it’s really possible.

For example…

Take the example of my husband trying to get the kids into the car. If I see that they took their shoes off, I look at them and say, “boots”. I don’t get mad. I don’t say anything else. I just calmly and say, “boots”.

The kid might start chatting about the toy they’re into, but I just smile and repeat, “boots”. Sometimes I have to say “boots” five times, but most of the time, with no frustration, the kid puts on the boots within a few minutes with minimal complaining.

One step at a time

Once the boots are on, I say, “car”. When we’re in the car, I say, “belt”. And so on. It’s not a perfect system. Of course, it doesn’t always work.

You get a feel for when the kids need you to squat down to their eye level and really listen to them. If they don’t feel like you heard them and you keep repeating just one word at them, it’s annoying. That would annoy you, too, I bet. Actually when that’s the case, I do more listening than speaking.

But, under ordinary circumstances, when I want them to do something…pick up a toy, throw something away, eat their dinner, go potty, wash hands, put on a coat, get in the car or buckle up…I say “toy”, “garbage”, “eat” (that’s a useful one), “potty”, “hands”, “coat”, “car”, or “belt”.

Sometimes, I do start with their name to get their attention. Then, I say the one word that conveys what I need them to do.

Find balance

Kids need regular conversation from you, too. I am NOT advocating for a steady stream of one-word commands to be spat at your kid like sunflower seeds. Find a balance between sincere conversation, active listening and the simple commands I mention here.

One of the best things you can do is look right in your baby’s eyes and talk to her. You should talk with your children about their feelings, their day, their art and anything important to them. Ask your kids to tell you the funniest thing that happened to them today. Have great conversations.

But, when you are running late, don’t get frustrated, don’t escalate and don’t get agitated. Just think of the one word that conveys what you need. Repeat it calm and clear.

Consider visiting that post I mentioned earlier, about encouraging kids to garden with you. And, you bet…in the summer, when the kids wake up in the morning, I pop my head into their rooms and say, “garden?”